
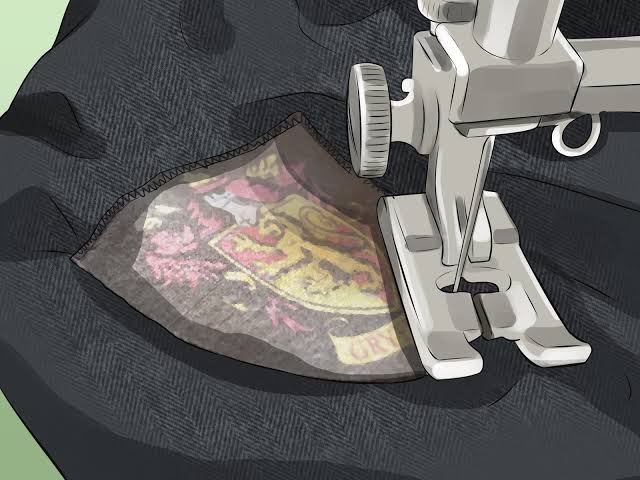
Learning how to sew on a patch is one of the easiest skills to pick up, and it gives you the strongest hold of any method. A sewn patch stays in place through washing, daily wear and heavy use, long after glue or heat would give up. This guide shows you how to sew on a patch in 7 simple steps, with the tools you need, the best stitch to use, and the mistakes to avoid.
What You Need Before You Start
You do not need special equipment to learn how to sew on a patch. Gather these items first:
- The patch and the item. A jacket, jeans, hat, bag or uniform.
- A needle. A sharp, medium-sized needle works for most fabrics. For thick denim or canvas, use a stronger needle.
- Thread. Choose thread that matches the patch border. If you cannot match it, pick a color close to the edge so the stitches blend in.
- Scissors. For cutting the thread.
- Pins or fabric clips. To hold the patch while you sew.
- A thimble (optional). Useful on thick fabric like leather or canvas.
Design your name patch freeWant to see your name on a patch before you order? Try our free custom patch tools and preview your design in seconds.
Which Patches Are Best for Sewing?
Most patches can be sewn on, and sew-on backing is the best choice when you want a lasting hold. Embroidered patches have a firm border that is easy to stitch through, and they are the most popular choice for sewing. Patches with iron-on backing can also be sewn for extra strength. If you are not sure which backing to choose, read our guide to the best backing for custom patches.
How to Sew on a Patch: 7 Steps
1. Prepare
The first step in how to sew on a patch is to wash and dry the item, so it does not shrink after you sew the patch on.
2. Decide the placement
Hold the patch against the item and check the position. For a chest patch, place it about 3 to 4 inches below the shoulder seam. On a cap, center it on the front panel. If you are not sure about the size, our custom patch size guide shows the best size for each placement.
3. Pin the patch in place
Use pins or fabric clips around the edges so the patch cannot slide. If the fabric is thin, place a small piece of cardboard or fabric inside the garment, so you do not catch the other side while sewing.
4. Thread the needle
Cut about 18 inches (45 cm) of thread. A longer thread tangles easily, and a shorter one runs out quickly. Thread the needle and tie a firm knot at the end. For extra strength, use a double thread.
5. Start from the inside
Push the needle up from the inside of the item, so the knot stays hidden under the patch. Bring it out just at the edge of the patch, close to the border.
6. Sew around the edge
This is the most important part of how to sew on a patch. Use a whipstitch or a running stitch around the patch border:
- Whipstitch: wrap the thread over the edge of the patch, then back down into the fabric. It is quick, strong and neat. Most people use this stitch to sew on a patch.
- Running stitch: sew in and out along the border, about 1/8 inch (3 mm) from the edge. This looks clean and works well for flat patches.
Keep the stitches small and evenly spaced, about 1/8 inch apart. Pull the thread snug, but not so tight that the fabric puckers.
7. Knot and finish
When you reach your starting point, push the needle to the inside of the item and tie two or three small knots. Cut the thread, and trim any loose ends. Remove the pins, and check that every edge is flat and secure.
Tips for a Strong, Neat Result
These small habits make the difference when you learn how to sew on a patch for the first time:
- Sew close to the border. Stitches near the edge hold better and look cleaner.
- Use strong thread. Polyester or nylon thread lasts longer than cotton on items that are washed often.
- Match the thread color. A matching color makes the stitches almost invisible.
- Sew through the whole border. Skipping sections leaves loose corners that lift over time.
- Reinforce the corners. Add one or two extra stitches at points and corners, where patches lift first.
For bags, jackets and uniforms, a sewn patch is also the best partner for heavier styles such as chenille patches and PVC patches.
Common Mistakes When You Learn How to Sew on a Patch
- Skipping the pins. The patch shifts, and ends up crooked.
- Pulling the thread too tight. This puckers the fabric around the patch.
- Using thin thread. It snaps with wear and washing.
- Sewing too far from the edge. The border lifts, and the patch looks loose.
- Forgetting the knot. The stitches come undone after a few washes.
Sew-On or Iron-On: Which Should You Choose?
Once you know how to sew on a patch, you will see that sewing gives the strongest hold, and it is the right choice for jackets, bags and items that are washed often. Iron-on is faster, and it suits light-use items. Many people use both: iron the patch on to hold it in place, and then sew around the edge for lasting strength. Read our comparison of iron-on vs sew-on patches, or our steps for iron-on embroidery patches if you want to try the heat method first. You can also learn more about sewing and the basic stitches.
Get Custom Patches Made With Sew-On Backing
Oceans Patches makes embroidered, PVC, woven, chenille, leather and sublimated patches in your own design. The minimum order is 5 pieces, and every quote includes a free mockup, usually within 12 to 24 hours. Choose sew-on backing so you can use the steps above, and see your design before anything goes into production. For larger orders, visit our bulk orders page.
Request your free mockup or email sales@oceanspatches.com with your design, size and quantity.