
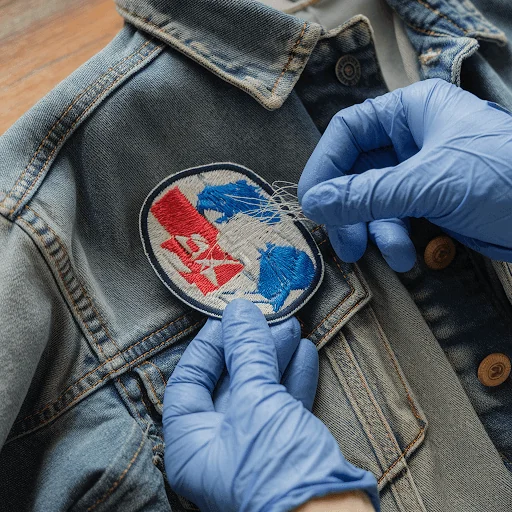
Sometimes you need to remove a patch. Maybe you want to move it, replace a worn one, or give a jacket a fresh look. The good news is that you can remove a patch safely at home, and the method depends on how it was attached. This guide shows you how to remove a patch in 6 easy steps, whether it is sewn on, ironed on or held with Velcro, and how to clean the fabric afterward.
First, Find Out How the Patch Is Attached
Before you try to remove a patch, check how it was put on. The wrong method can tear the patch or mark the fabric.
- Sewn on: you can see thread around the edge of the patch.
- Iron-on: no stitches, and the patch feels flat and slightly stiff, with a glue layer on the back.
- Iron-on and sewn: many people iron a patch on to hold it, then stitch around the edge.
- Velcro: a soft loop panel is sewn on the item, and the patch peels off.
If you are not sure, turn the item inside out and look at the back of the patch area. Stitches show on the back, and glue shows as a stiff, flat area.
What You Need to Remove a Patch
- A seam ripper (or small, sharp scissors)
- Tweezers
- An iron and a thin cotton cloth
- A lint roller or a piece of tape
- A soft cloth and mild soap
- A good light, so you can see the stitches
How to Remove a Patch That Is Sewn On
A sewn patch is the easiest to remove, because you only need to cut the thread.
1. Turn the item inside out
Look at the back of the patch. The stitches are easier to see and cut from the inside.
2. Cut the stitches
Slide the seam ripper under a stitch and cut it. Work slowly along the edge, and cut every few stitches. Do not cut the patch or the fabric.
3. Lift the patch and pull the thread
Once enough stitches are cut, lift the patch away from the fabric. Pull out the loose thread with tweezers, and remove the small pieces left behind. Use a lint roller to pick up the rest.
How to Remove a Patch That Is Iron-On
An iron-on patch is held by heat-activated glue, so you use heat to soften it again.
4. Heat the patch
Place a thin cotton cloth over the patch. Set the iron to the cotton setting with steam off, and press for about 15 to 20 seconds. The glue softens as it heats. Do not use this method on fabrics that are damaged by heat, such as nylon, leather or waterproof coatings. For those, use the cutting method or ask a tailor.
5. Peel the patch while it is warm
Lift a corner with tweezers or a fingernail, and peel the patch slowly while the glue is still warm. If it resists, heat it again for a few seconds. Never pull hard on a cold patch, because it can tear the fabric.
Clean the Fabric Afterward
6. Remove glue and stitch marks after you remove a patch
When you remove a patch, glue can leave a sticky shadow where the patch was. To clean it:
- Reheat and rub: place a clean cloth over the area, press with the iron for a few seconds, and the cloth often picks up the glue.
- Use a gentle cleaner: dab a little mild soap and water on the spot, or use an adhesive remover that is safe for the fabric. Test it on a hidden spot first, because some cleaners change color.
- Wash the item: wash it as normal to remove any leftover residue.
Stitch holes usually close up after washing and a light steam. A faint outline may stay if the patch has been there for a long time, because the fabric underneath did not fade. If that happens, cover the spot with a new patch.
How to Remove a Velcro Patch
A Velcro patch is the simplest. To remove a patch with Velcro, hold the item flat and peel it off. Keep the Velcro side clean with a lint roller, so it holds well next time. A removable backing is a smart choice if you like to change patches often. See our guide to the best backing for custom patches to compare iron-on, sew-on and Velcro.
Common Mistakes When You Remove a Patch
- Pulling the patch before cutting the stitches. This tears the fabric.
- Using too much heat. High heat can scorch fabric or melt synthetic materials.
- Skipping the cloth. Direct heat can mark the item and the patch.
- Using a strong cleaner without testing. Always test on a hidden spot first.
- Rushing. It takes 10 to 20 minutes to remove a patch safely, and patience protects the fabric.
Can You Reuse the Patch After You Remove It?
Often yes. A sewn patch that was removed carefully can be sewn on again, so it is a good way to move a patch to a new jacket. An iron-on patch usually loses most of its glue once you remove it, so it is best to sew it back on. Read our steps for how to sew on a patch for a strong, lasting hold.
If you plan to iron on a patch again, check your fabric first with our free iron-on guide, and read our guide on how to iron on patches. You can also learn more about the tool you will use most, the seam ripper.
Choose a Backing You Can Remove Later
If you want patches you can change easily, choose the backing before you order. Velcro lets you swap a patch in seconds, sew-on is the strongest for permanent use, and iron-on is quick but harder to remove cleanly. When you request a quote, tell us how you plan to use the patch and we will suggest the best backing. For help choosing a size, try our patch size finder.
Get Custom Patches With the Backing You Want
Oceans Patches makes embroidered, PVC, woven, chenille, leather and sublimated patches in your own design. The minimum order is 5 pieces, and every quote includes a free mockup before production, usually within 12 to 24 hours. Standard production takes 12 to 14 days after approval, and shipping is free worldwide, including the USA.
Request your free mockup or email sales@oceanspatches.com with your design, size, quantity and preferred backing.